I'm still a newbie crafter and blogger, but I wanted to share a few of my creations with you. Nothing spectacular, but all are made with love for my family and friends who are such a blessing to me.
* Teacher Gifts *
Here are a few teacher gifts I made for some friends who were looking for a special year end thank you for their child's teacher. Enjoy!
 |
| Wood Name Plaque for the Teacher's Desk {hand painted, customized} |
 |
| Wood Plaque for the Teacher's Desk {hand painted, can be double-sided with Teacher's name on reverse} |
 |
| Shelf Sitter |
 |
| Small Ornament * Shelf Sitter * Magnet {wood, hand painted, customized} |
 |
| Small Ornament * Shelf Sitter * Magnet {wood, hand painted, customized} |
 |
| Small Ornament * Shelf Sitter * Magnet {wood, hand painted, customized} |
 |
| Wood Key Hook |
* Monogrammed Cake Board *
I was looking for a way to spruce up the door to our daughter's bathroom since it is also the guest bathroom. I didn't want to spend much moolah {or any moolah if I could help it}, so I decided to try the cake board route again. I had a few large rectangular cake boards left over from a previous project, but they were too big for my intended purpose. I found a nice round cake board with scalloped edges at WallyWorld {pack of 4 for $3.50} and an idea came to me:


Not only was it inexpensive, it was just the right style for my tween.
At only 14" in diameter, I painted the background a chocolate brown, then used tracing paper to trace her initial onto the board. All I did was print off the letter I wanted in the font of my choice. I cut it out, laid it on top of the tracing paper and traced it onto the board. I then hand painted the initial and added the dots in the scallops. All with acrylic craft paint we had on hand. I hung it on her bathroom door with a Command Strip and called it a day.
* Fall Pumpkin Decor *
I had a few "faux" pumpkins in with my fall decorating box, but I didn't think they really stood out against our wall color. I'm starting to get into using white to decorate, so I decided I'd try it in small doses for fall and see how the family liked it.
My first attempt was to turn a "faux" pumpkin into a vase. First, I spray painted the little guy {heriloom white}, then I just cut the top off and tried to artfully arrange some fall foliage . I added a berry vine and popped the newly white pumpkin vase on top of a stack of antique books. It anchors the mantle display, which sports more "faux" painted pumpkins arranged as topiaries.
Thankfully, all of these items had been in my fall decorating box for a number of years, so I didn't spend any money on new decor. Add that one to my list of Thanksgiving!


* School Organization Blessings *
Our first week of home school went smoothly, partly because we worked hard to re-establish our school area. In this blessed matchbox of a home in which we live, there isn’t much room for us to spread out, so we modified and relocated our “school room”.
Out of the “spare” bedroom we moved {it is used as a playroom, a library, a storage room and, on occasion, a bedroom for any guest willing to sleep on a roll-away bed or in a sleeping bag on the floor}. Using the room as a school room was difficult - too many distractions. We are now doing lessons out in the dining room, which is the only dining area we have – so it has to look nice. Fortunately, there is a bookcase built into the end of the kitchen island on the dining room side of the kitchen. That bookcase is serving as command central for most of our home school books, curriculum, and supplies.

We pared down our books, binders, folders and supplies so that we had only what we will need for the first six weeks of school.
To organize Katherine’s six subjects’ worth of textbooks, workbooks and folders, we repurposed three large magazine organizers {that previously held long forgotten coloring books}.
To keep pencils, highlighters, colored pencils, rulers and scissors in one neat spot, we repurposed a large, cardboard “drink” carrier we found in my in-laws’ recycle bin. Originally, I thought about covering is with scrapbook paper, but it was a pain and I really wanted it to just blend in on the shelf and not stand out too much. Instead, I spray painted it a neutral ivory and wrapped the handle with jute to keep the cardboard from digging into our fingers when we carry it. A nifty little jute bow wrapped around the middle finished off our project.


And because I really didn’t get crafty much this summer, I made a fun little wood plaque to display on our school shelves. It’s so much fun to see what you can make out of a scrap piece of 2x4, some sandpaper, spray paint and left over rustic red scrapbook letters! And in less than 15 minutes, it satisfied the need to get my craft on – yet still be relevant to keeping our school area organized!

How did you get organized for your first week of school?
* A Few of My Favorite Things Memory Book *
I cannot believe that my last post was in February of this year! How did that happen?!? Our family has been busy with school, work and of course -- swimming -- but is it possible that I composed all of my updates in my head and never posted them?! Good grief -- I'm blaming it on inhaling too much chlorine.
That's my story and I'm sticking to it...
Jumping from February to late July...
We finished a very successful year of home schooling, Katherine enjoyed a very successful swim season, and Doug had several successes at work. I spent the last five months driving the swim taxi for my sweet girl and her teammates who needed a ride to and from countless practices. My life isn't very exciting, but I am so happy that I have the life that I do!
At one of the many meets we attended over the last several months, one of Katherine's teammates {I’ll call him *C*} shared with both parents and friends a special scrapbook he made out of an old composition book. Nothing fancy -- no layouts, no emotional 'journaling', no cropped and matted photos. Just things from his every day life over the last year that meant something to him: candy wrappers, stickers, tickets, notes, awards, postcards, drawings, class notes.
For a boy of 13, this young man impresses me because of his sensitivity -- and I love that he is always himself. I mean, what 13 year old boy do you know makes a scrapbook and brings it to share with his teammates? He is smart and funny, but also confident enough in himself that he can be who God made him to be. It's hard to find that in people of any age, but especially unique in a teenage boy. Peer pressure at that age is relentless, even if it is subtle.
But I digress...
What I realized as I flipped through this boy's homemade book is that he made a simple treasury of his blessings. His every day blessings. His happy memories, and even some of his not so happy days. It made me think of all of the fancy, expensive scrapbooks I have made in the past, and how I needed to get back to that, but in a more basic and meaningful way. I'm not a journal-er, so keeping up with a diary isn’t my thing, and I don't have the money or time to scrapbook the way I used to…
I did have one of Katherine's old composition books, and lots of little bits of happy memories in the form of sweet notes from my hubby, handmade cards from my girl, small crafts made by toddler hands, postcards from people I love, etc. So, in the spirit of memory keeping, and inspired by *C*, I came up with A Few of My Favorite Things:
 |
| Katherine's 3rd Grade composition book. I tore out the used pages... |
 |
| A few pieces of scrapbook paper, a ribbon and a metal embelishment |
 |
| A place for notes * postcards * drawings * a running list of my favorite books * my bucket list * museum souvenirs |
 |
| This says it all! |


I have this little jewel out for anyone to see. I want to share my favorite things, and have it handy to jot things down -- or even to just remind myself of the blessings I've been given.
I hope you are all enjoying a wonderful summer with your family and friends, and I hope that you know that even if you don't see me or hear from me often, I keep you all in my heart and in my prayers!
Bring on the BURLAP!
My sweet girl is wanting a more grown-up bathroom, and since it is also the guest bathroom, I would love for it to be a bit more mature. She had chosen a very neutral palette with a vintage/French theme. Her awesome Dad is going to do a few repairs to a water damaged wall, then add some vinyl beadboard all the way around. Once that is up, we will paint and decorate. I made these two pieces of burlap art to go in her new bathroom and I am very surprised that she loves them! They were super easy and made with materials I had on hand. The bonus {aside from her loving them} is that burlap is so "IN" right now, but I didn't have to pay a penny for the designer stuff that looks similar. {Sorry Ballard Designs, but I couldn't afford you!}


 |
| {finished back} |
A new "bow" for the Changeable Bow Frame
In a previous post, I mentioned that I wanted to keep my favorite photo of our family in a frame year around, but that I wanted to be able to coordinate the frame with the season's decor. I decided to glue a small piece of metal flashing on the center of the frame, then made several "ribbons" with magnetic backs so that I could change them out with my seasonal decor. The photo below shows my beloved family framed and adorned with a "bow" made from cedar sticks collected from the family ranch, tied with a jute string and accented with rosettes I made out of one of my old soft tshirts that had started to wear a bit thin around the seams. {Can you tell I am loving the natural fibers and materials that are becoming popular?!? I love the simplicity these elements bring into our home.}

More Heart Day Decor
These pink hearts hung from a tulle ribbon in Katherine's rabbit-themed nursery! Yes, they are ten years old and needed to either be put in the garage sale, given away or repurposed. You can see that I chose to repurpose them! I simply gathered more cedar twigs {Doug's parent's house in the hill country is an awesome place to collect all kinds of natural elements for decorating}, plopped them in a glass vase, then skewered the hearts onto the top of the twigs. I gussied up the vase with some scrapbook paper and a strip of linen serves as a rustic bow. Oddly, both Doug and Katherine have commented on how much they like it, so I guess it's a keeper...

This sweet Valentine vignette was made from a little bit of this and a little bit of that.
A Dollar Store tray got spray painted a flat brown {it was actually cammo paint!}
and topped with antiqued book page hearts; a "kissing ball" made from
a strip of pink crepe paper streamer nestles among the hearts. I had Kat
help me pick out brown, pink, cream and red buttons
from our stash of vintage buttons to scatter around the tray.
  |
| Book Page Antiqued Flower |
 |
| Felt Heart Wreath |
 |
Book Page and Jute Bouquet |
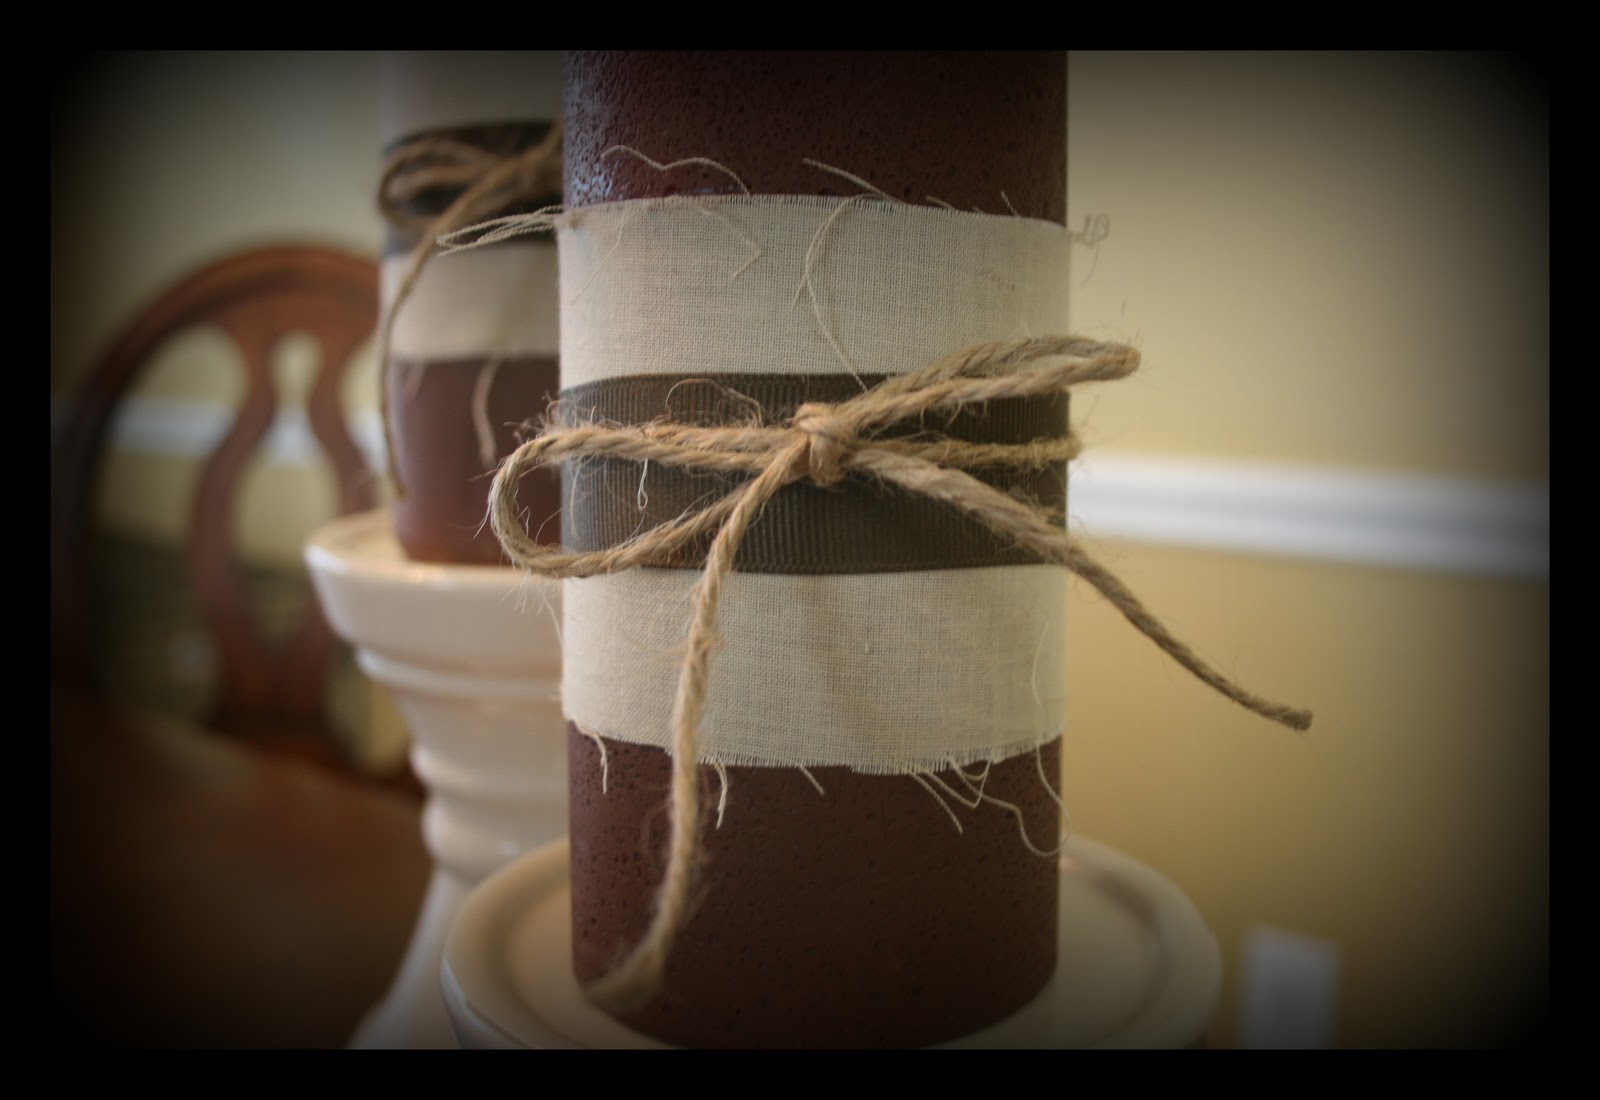
What do you do with a couple of mis-matched candles {one pink, one burgundy} and an old, rusty finial?
Sweet *n* Easy Candle Makeover!
 |
| * maple brown paint * * strips of linen * * grossgrain ribbon * * jute * |
 |
| Locket Candle This sweet candle was made using a broken sterling silver keychain locket that my sweet hubby and daughter gave me one year for Valentine's Day. I wrapped a glass jar candle with brown kraft paper and burlap; I tied a chocolate brown grossgrain bow through the top of the locket then hot glued it to the front... If you open the locket, you will see a photo of my sweet loves! |